DL for Thunderbird
The bundled extension “Thunderbird-Filelink-DL” integrates with the new Thunderbird’s Filelink functionality, by using the REST service provided by DL 0.10 and onward. The extension allows to convert large attachments to links automatically and generate upload grants directly within the Composer window.
The extension is also available as an official Thunderbird Addon since 07/2013. This page contains the same extension as a stand-alone, up-to-date download, and a short installation/usage guide.
Please note that this extension requires your own “DL” service to work, which must be installed on a server by yourself, your system administrator or company. Read more about DL for a quick introduction, list of features and installation instructions.
Download
Here’s a brief list of the latest 5 available releases (most recent first):
- DL for Thunderbird 0.17.2: Compatible with Thunderbird 13-52.
- DL for Thunderbird 0.17.1: Compatible with Thunderbird 13-45.
- DL for Thunderbird 0.17: Compatible with Thunderbird 13-38.
- DL for Thunderbird 0.13: Compatible with Thunderbird 13-31.
- DL for Thunderbird 0.12: Compatible with Thunderbird 13-25.
You might need to right-click and “Save Link As…” for the links above to download.
You can find older versions in releases/.
Usage
Sending a large file
Usage is incredibly simple. Just compose a new message and attach one or more files like you normally would. If the attachment exceeds the configured limit, Thunderbird will offer to convert the attachment to a link:
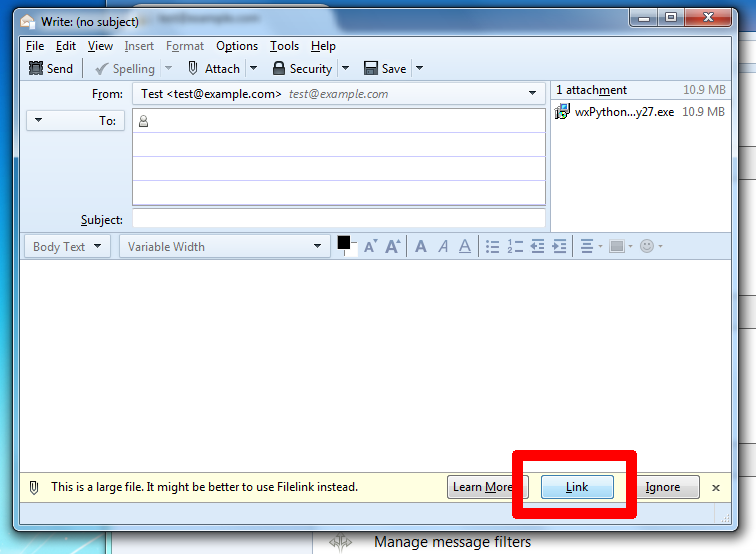
Simply click “Link” at the bottom of the message.
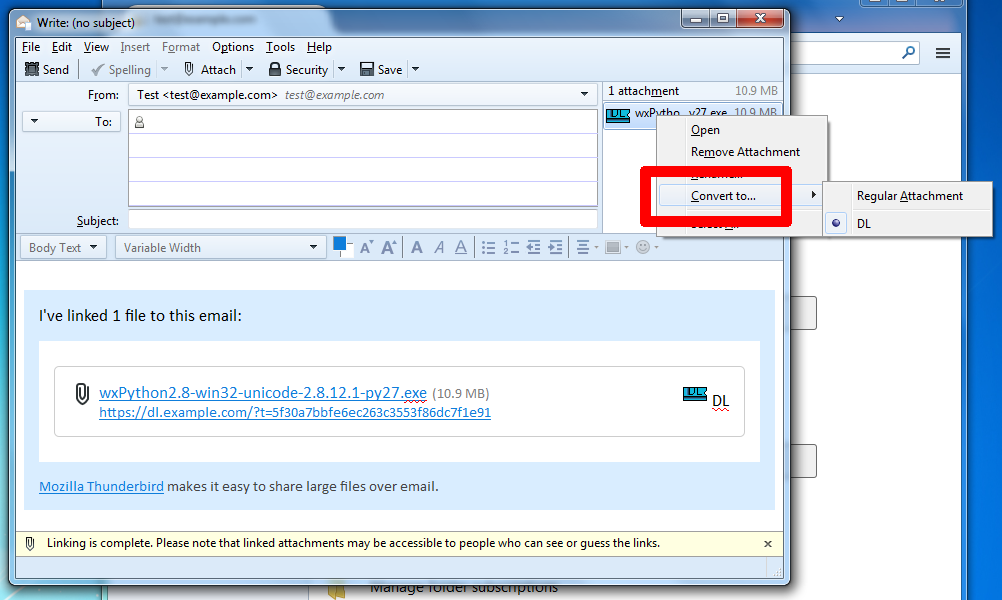
You can also manage the attachments individually and independently of the size by right-clicking on the individuals files:
Receiving a large file
Sometimes you cannot receive large files: your mailbox is too small, or your recipient doesn’t have anywhere to upload the file to. In this case, just generate a grant using “Tools” .. “Insert upload grant”.
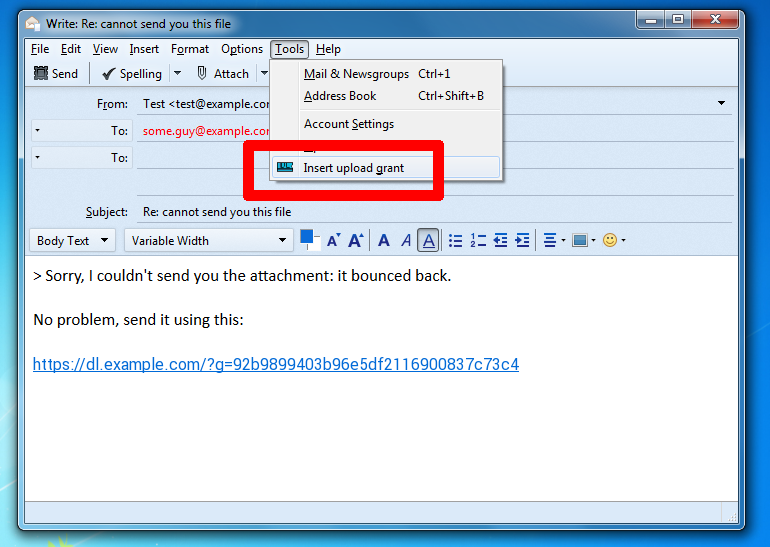
A “grant” allows one file to be uploaded through a normal link. As soon as the file is uploaded, you’ll receive a notification at your email.
If you find yourself using grants often, there is also a toolbar icon at your disposal. Right-click on the toolbar and choose “Customize …”. Drag the “Insert upload grant” button as desired on the main toolbar.
Installation
Note
If you installed the extension through the official Thunderbird Addon website, you can skip directly to Configuration.
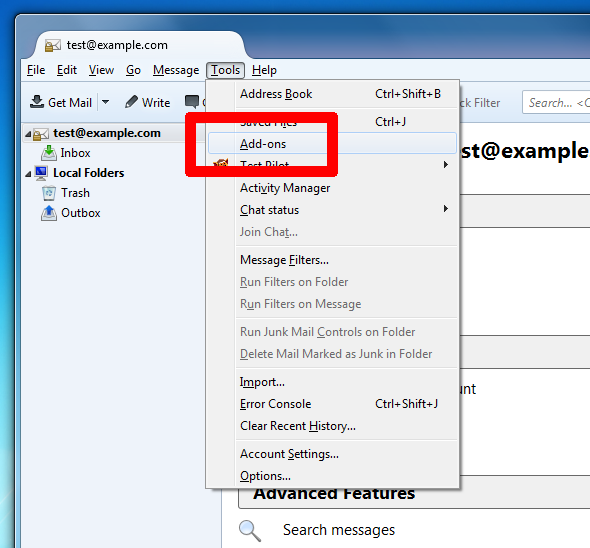
First download the extension. Press “Alt” to show Thunderbird’s menu (if necessary), and select “Tools” .. “Add-ons”:
Click on the “Settings” icon just next to the search bar, select “Install Add-on from file…” and choose the file you just downloaded:
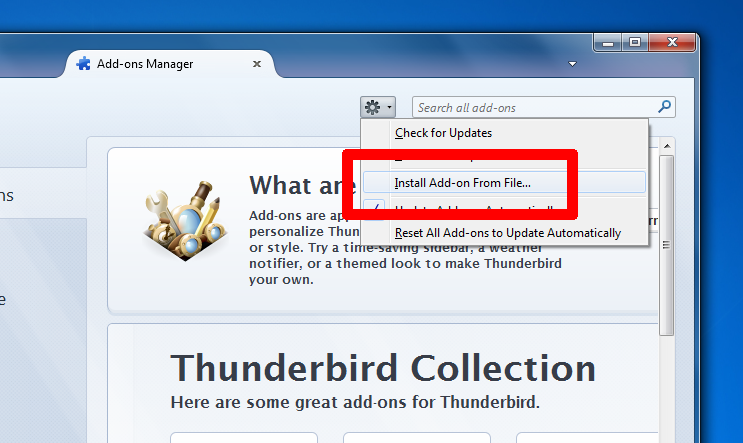
Then restart Thunderbird.
Configuration
After installing the extension, press “Alt” to show Thunderbird’s menu again (if necessary), and select “Tools” .. “Options…”, then go to the “Attachments” .. “Outgoing” tab:
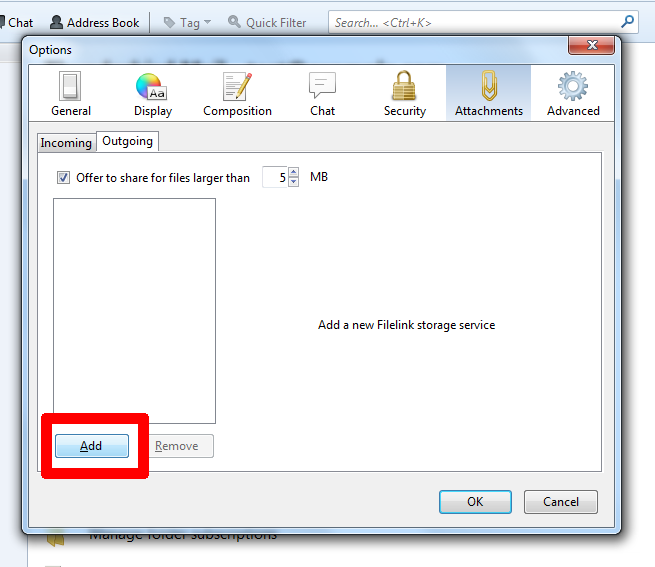
Click “Add” at the bottom-left of the panel, and select “DL” from the list to configure the service:
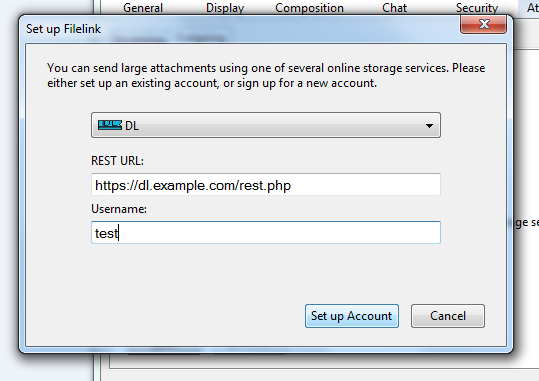
“REST URL” is normally the URL of the service with “/rest.php” appended (but ask your system administrator for confirmation).
After entering your user-name, click on “Set up account”. Thunderbird will prompt for your “DL” account password (tick the “Remember this password” to avoid password prompts when attaching files later).
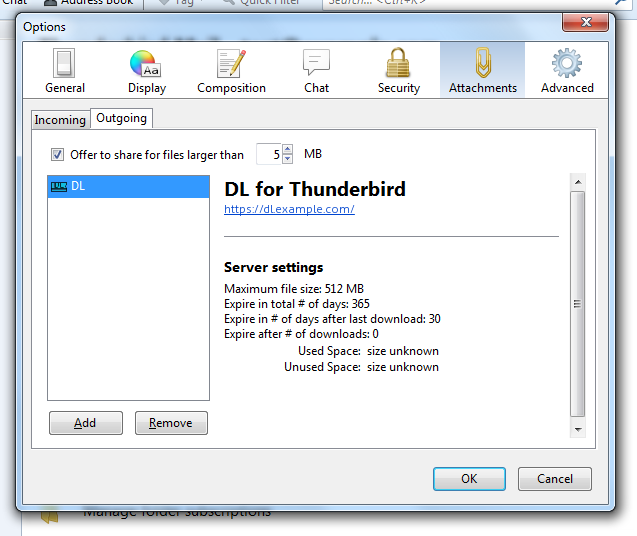
When the service is configured correctly, Thunderbird will show the current account settings. At the top you can set how large attachments should be before Thunderbird will ask to convert attachments to tickets.
Troubleshooting
When setting up a new account, you might receive the message “An error occurred while setting up the account!”.
If this is the first time you are setting up DL, ensure that the web interface works before proceeding.
Try to perform a login from the web interface using your username and password.
If the web interface doesn’t work, re-read the Installation manual to check for potential configuration problems.
If the web interface appears to be working, but you cannot login, double-check your username and password.
If the web interface works, but you still cannot setup an account, check that the “REST URL” is correct.
To ensure the “REST URL” is correct and working properly, copy&paste the URL into a browser. If you get a server error, the URL is likely to be written incorrectly.
If the URL is correct, you must get a blank page. When using external authentication, the browser must also prompt for an username/password.
If you are sure that the URL is correct, but you still receive a server error or the browser keeps asking to login, there is likely a server configuration problem. Re-read the Installation manual, in particular the Web server configuration section about the special configuration required for rest.php.
If the two above work, but you still cannot setup an account, check if you’re using an https URL with a self-signed certificate.
Open the Thunderbird’s error console by going to the “Tools” .. “Error Console”. If you see an error similar to the below:
example.com:443 uses an invalid security certificate.
The certificate is not trusted because no issuer chain was provided.
(error code: sec_error_unknown_issuer)
You’ll probably need to manually add your SSL certificate to Thuderbird’s trusted certificate list, by going to “Edit” .. “Preferences” .. “Advanced” .. “Certificates” .. “View Certificates” .. “Add Exception”.
If all the above fail, see the details about General/support mailing list to get in touch with the authors.
Known limitations
- Used/unused space in the preferences always show “size unknown”.
- Currently there is no way to override server’s defaults for the ticket expiration settings.
- Error messages are too generic and do not help troubleshooting issues.
More information
Please read the official Filelink usage tutorial as provided by Mozilla for more resources.
See General/support mailing list for any additional doubt.